Group Clashes by Proximity
The following steps will show you how to group clashes based on the proximity distance.
STEP 1:
Go to Standard tools in iConstruct panel and run the Clash Manager tool. 
STEP 2:
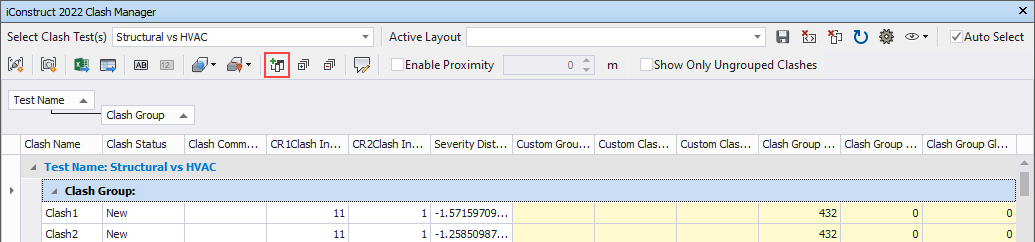
Check Enable Proximity checkbox and specify the proximity distance. 
The distance can be changed at any time, click on the Refresh button in the Clash Manager ribbon to apply changes. 
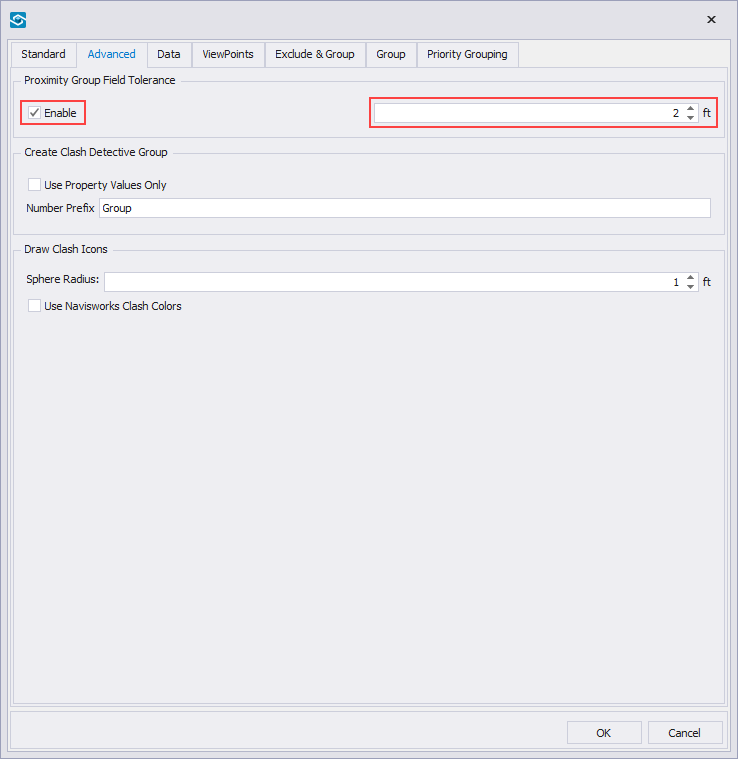
Alternatively you can set the proximity distance by clicking the Options icon in the dialogue.  Go to Advanced tab, click Enable under the Proximity Group Field Tolerance and set the proximity distance. Click OK.
Note: Proximity distance is always based on the unit of the model and can be changed in Navisworks Options Editor > Interface > Display Units > Linear Units
STEP 3:
Click on the Column Chooser tool in the Clash Manager ribbon.
STEP 4:
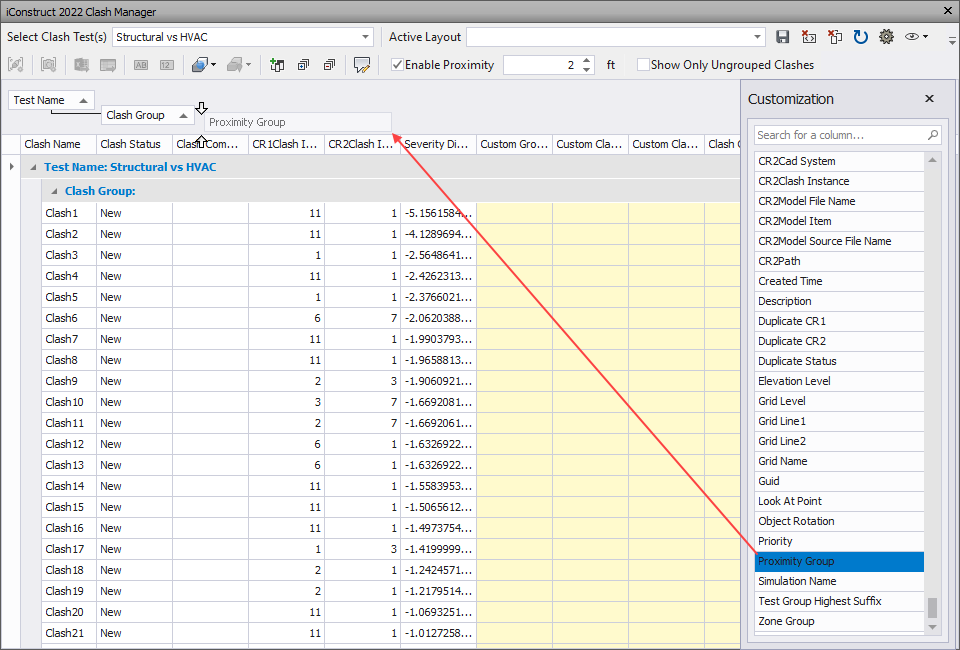
Drag and drop Proximity Group from Column Chooser to the tree structure in Clash Manager dialogue.
STEP 5:
Optional: Once your grouping layout is set, click on Save icon in the Clash Manager ribbon, give your Layout a name and Save. 
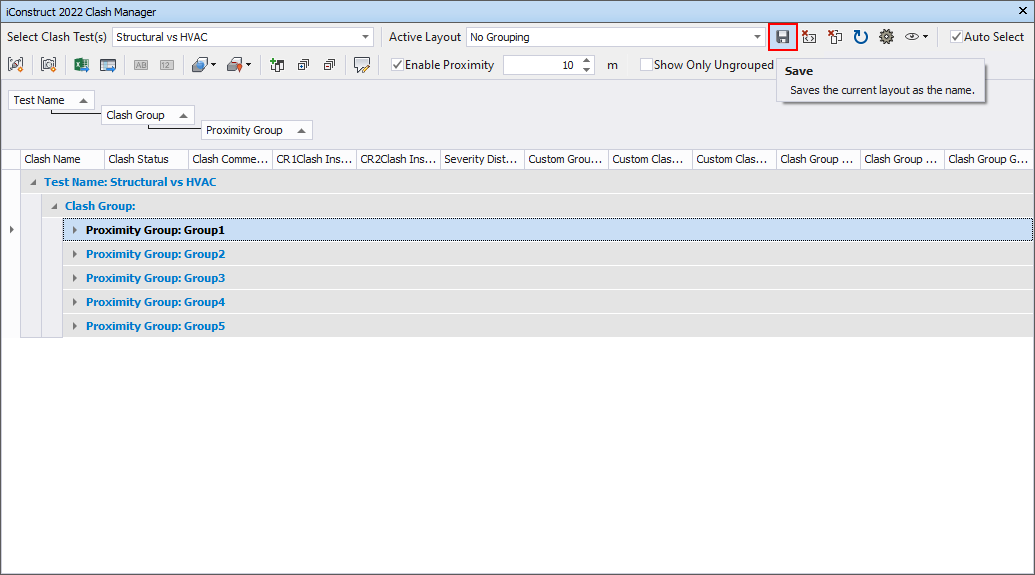
Note: Saved layouts can later be reused with other clash tests and models as well as used in BIMflow. You can switch between different pre-saved layouts from the drop-down menu. To switch between Layouts, at least two are required.
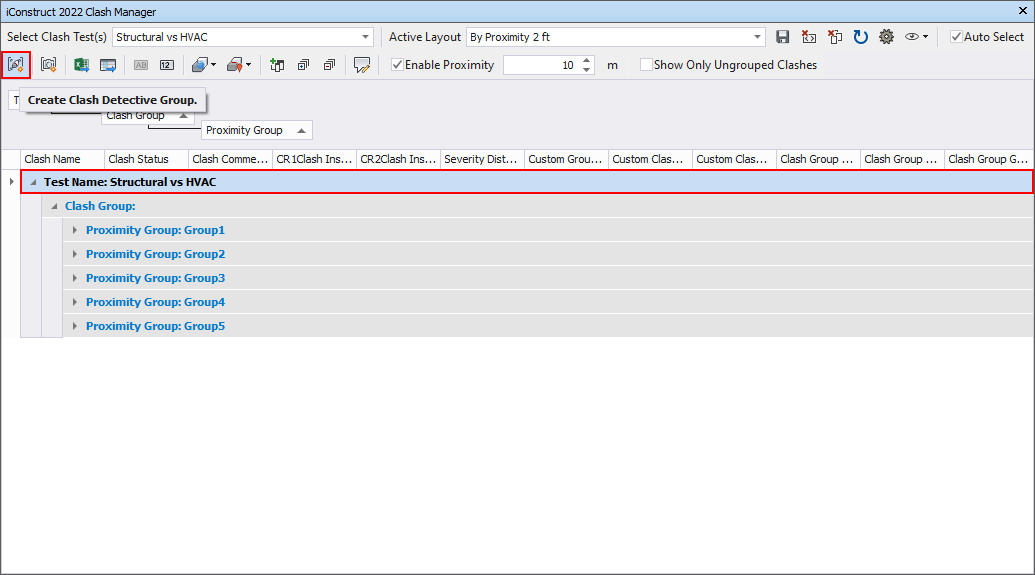
STEP 6:
To push defined grouping back into Clash Detective select desired grouping level (Test Name: Structural vs HVAC in our example) and click on the Create Clash Detective Group icon in the ribbon. 
Quick Overview:
Go to iConstruct panel ➤ Run Clash Manager tool ➤ Apply the Enable Proximity option, specify the proximity distance ➤ Run Column Chooser ➤ Drag&Drop Proximity Group ➤ Save the Layout ➤ Select Clash Groups ➤ Create Clash Detective Groups