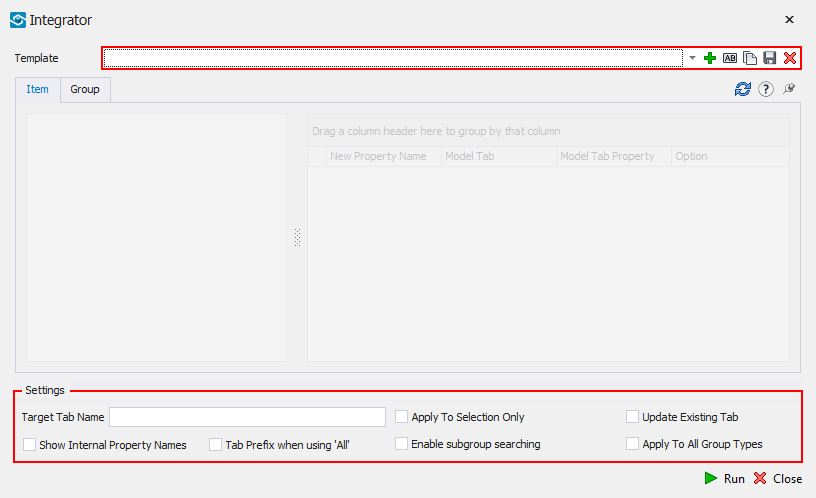
Integrator Settings
There are a number of items on this configuration window, here is the detailed description of it.
New:
Creates new template.
Rename:
You can rename a current template that has already been created.
Copy:
You can copy a template and give it a new name.
Save:
Save the current configuration to a new template or update existing.
Delete:
Delete a saved Integrator Configuration templates.
Refresh:
Collects the data from the selected sample Item or Group data to be used in Integrator in setting up your custom user tabs.
Target Tab Name:
Will be the display name of the customised data tab inside of Navisworks when the Integrator command is run.
Apply to Selection Only:
Only intergrates the selected items otherwise it does the whole model
Update Existing Tab:
Updates the current user data tab rather than removing it and starting again
Show Internal Property Names:
Will display a read-only column in the configuration grid of the internal property names of items selected within the model. This can be used If you have renamed the Standard Name in the configuration grid to a standard terminology, and still need to check what property it relates too.
Tab Prefix when using 'All':
When using the ‘All function’ it will prefix the property with the tab (‘Item – Name’ rather and ‘Name’)
Enable Subgroup Searching:
If it is looking for the property on the group, but it doesnt exsist on the group but exists on the item, it will take the proeprty from the item and map it to the group.
Apply to All Group Types:
Normally, iConstruct only applies at the group level what Navisworks classifies as a group. This option allows for every type other than ‘Geometry’ to be classified as a group
Run:
Runs selected tamplate.
Close:
Closes the Integrator Configuration dialogue.
After the sample properties have been retrieved from the model, you can now begin to set up your custom user tab using Integrator’s configuration grid. There are a number of columns in this section which will assist with the process.
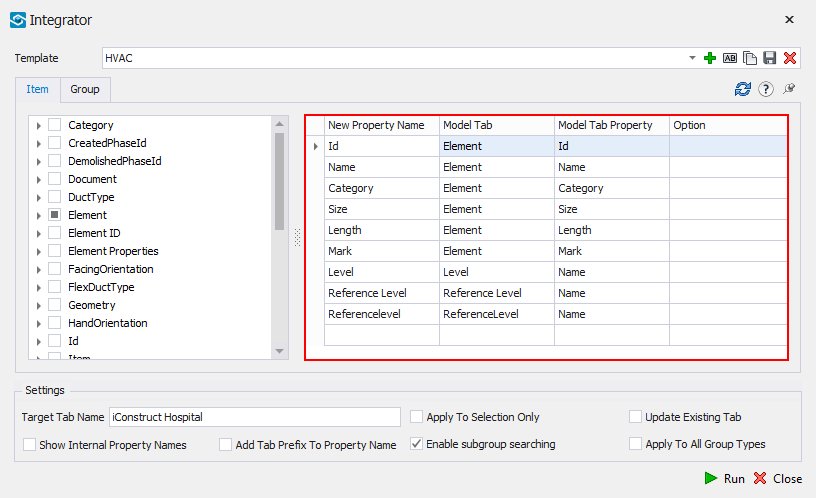
New Property Name:
The name that is given to the property inside of the custom user tab. This can be used to create a standardisation in terminologies for properties within models.
Model Tab:
The internal Navisworks attribute that Integrator will be collecting the data from to include on the custom user tab.
Model Tab Property:
The internal Navisworks property that Integrator will be collecting the data from to include on the custom user tab.
Option:
There are a few keywords that can be used with Integrator to perform extra functions on the data as it is being transferred and therefore maximize efficiency as well as sanitize data. Keywords are now available in an easy-to-use drop down list.
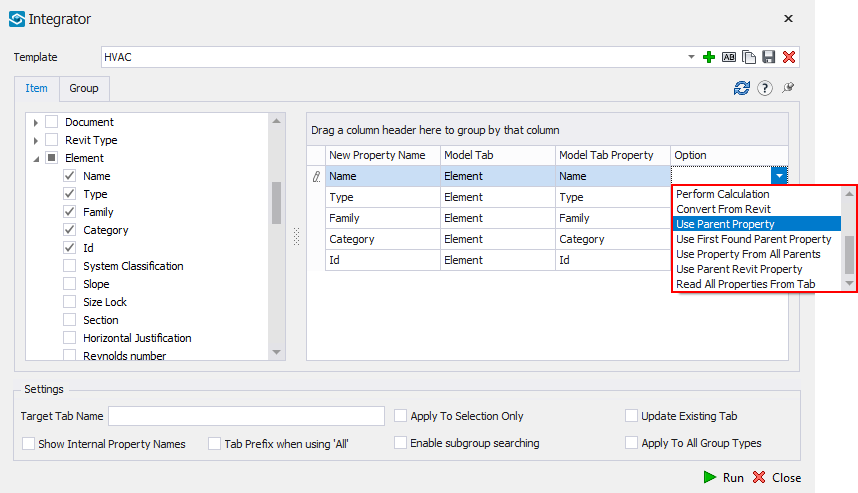
Convert To Decimal: Attempts to convert the property to a decimal number, stripping away any text from the property value. If the property cannot be converted to a number, then the default ‘0’ is used.
Convert To Integer: As above but converts to a whole number instead of a decimal.
Convert To Date: Attempts to convert the value to a date format. Note that Navisworks does not currently support date formatting or time zone information so use this carefully.
Format As Text: Takes the existing value and converts it to text.
Sum Group Property: Use with ‘Enable subgroup searching’ to add the item field as a total for the group node.
Perform Calculation: Displays the calculations stored in the profile for the user to select to run when processing the property. Good for converting metric to imperial measurements.
Convert From Revit: Converts from the native Revit data type (volume, length etc.) to a decimal number. Also removes any extraneous text from text fields.
Use Parent Property: When processing an item field, first looks in the parent node for the same field and uses that instead, like ‘Enable Subgroup Searching’ (see 5.3) in reverse except the parent property takes precedence. Useful when processing Revit models so all unique identifiers are at the same hierarchical level.
Use Parent Revit Property: Same as ‘Use Parent Property’ except ‘Convert From Revit’ is applied at the same time.
Read All Properties From Tab: Will call all property fields from the tab when assigned to the one property selected from the tab.
Parse Excel Formula: allows you to use excel formulas combined with Navisworks properties.
Example 1: =PROPER("[Element].[Category]" & " - " & "[Item].[Name]")
Example 2: =MID("[Item].[Name]",1,6)&"-"&MID("[Item].[Icon]",1,5)