Configuration
The following steps will show you how to use Room View Creator.
STEP 1:
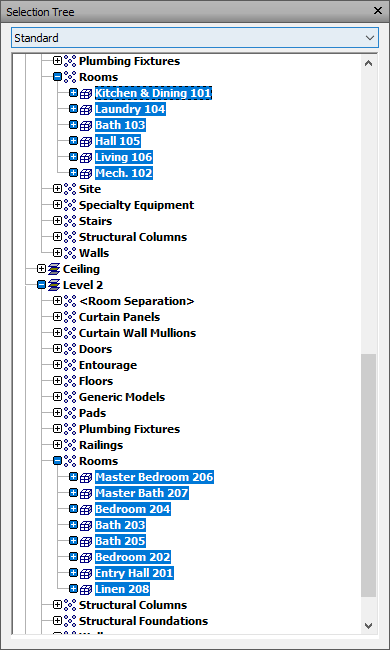
Create a Selection Set of all your Rooms (Rooms in our example).
Note: Selection Set must be created at the level that has the properties that you want to use. Search Set is not supported.

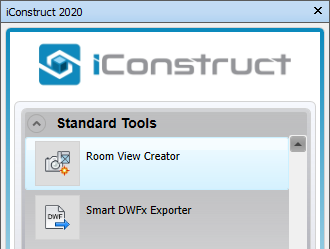
STEP 2:
Go to Standard Tools tab in the iConstruct menu and click Room View Creator button.
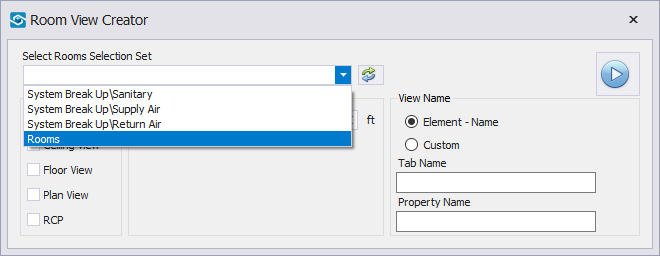
STEP 3:
The Room View Creator dialog box comes up. Select a Selection Set from the drop-down list (Rooms in our example).
STEP 4:
Select a type of view that you want to create (Plan View in our example).
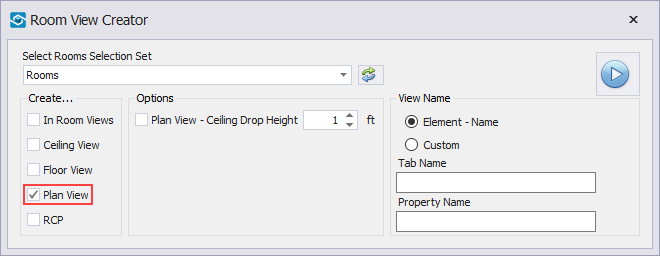
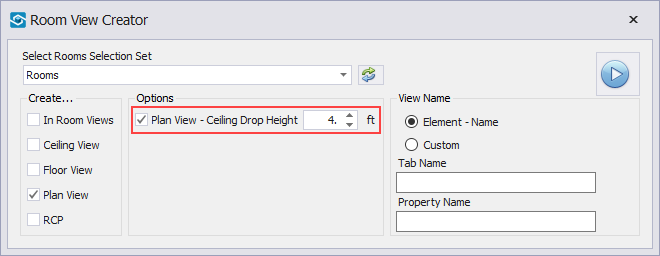
STEP 5:
When Plan View is selected you can drop the height so the plan view will excude the ceiling.
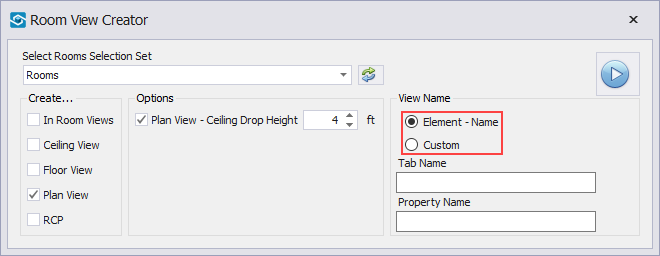
STEP 6:
Select a property to be used as the name of the created viewpoint. In our example we used Element - Name. If you want to use a different property, you can choose Custom and define the Tab Name and Property Name.

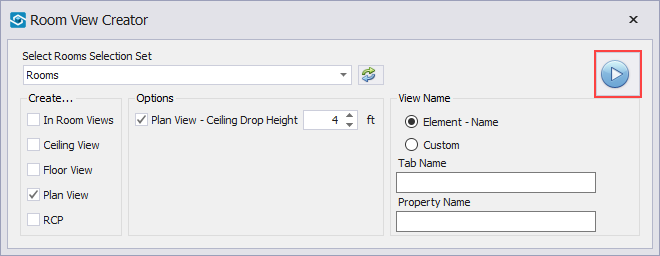
STEP 7:
Click Run and wait for the process to finished.
STEP 8:
Once the process is finished, a new dialog box will come up saying Complete. Click OK. You will find the newly created Room views in the Saved Viewpoints window.


Quick Overview:
Create a Selection Set ➤ Go to Standard Tools ➤ Click on Room View Creator ➤ Select Room Selection Set ➤ Define a type of view ➤ Select a property to be used as the view name ➤ Click Run ➤ Click OK