Configuration – Item Mapping
The following steps will show how to prepare a configuration for exporting Navisworks model to IFC format with associated data and mapped items.
STEP 1:
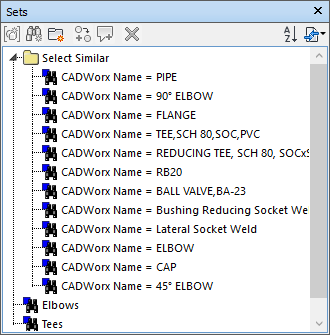
To be able to map the items you need to have Selection Sets set up.
STEP 2:
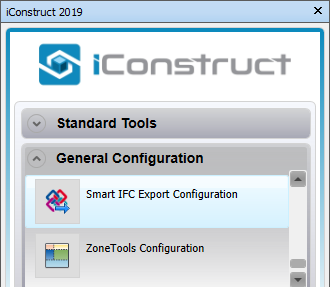
Go to General Configuration tab in iConstruct panel. Click on Smart IFC Export Configuration tool.
STEP 3:
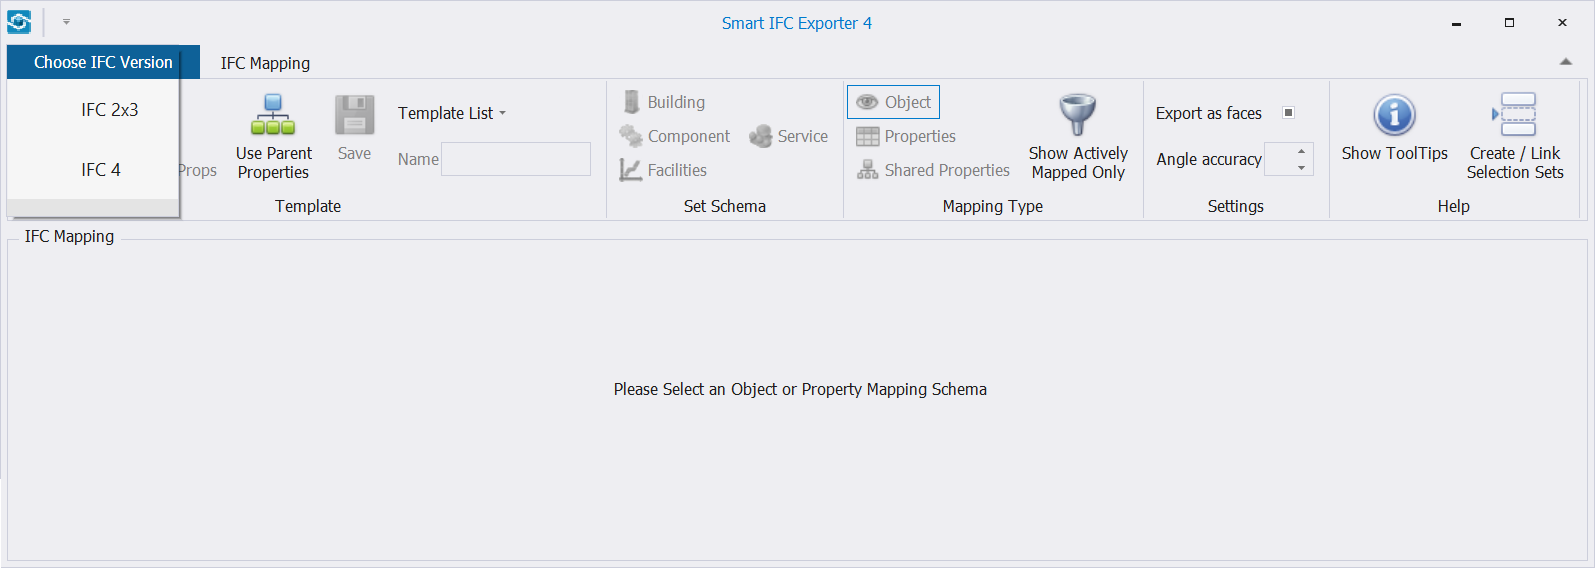
Select your IFC version.
STEP 4:
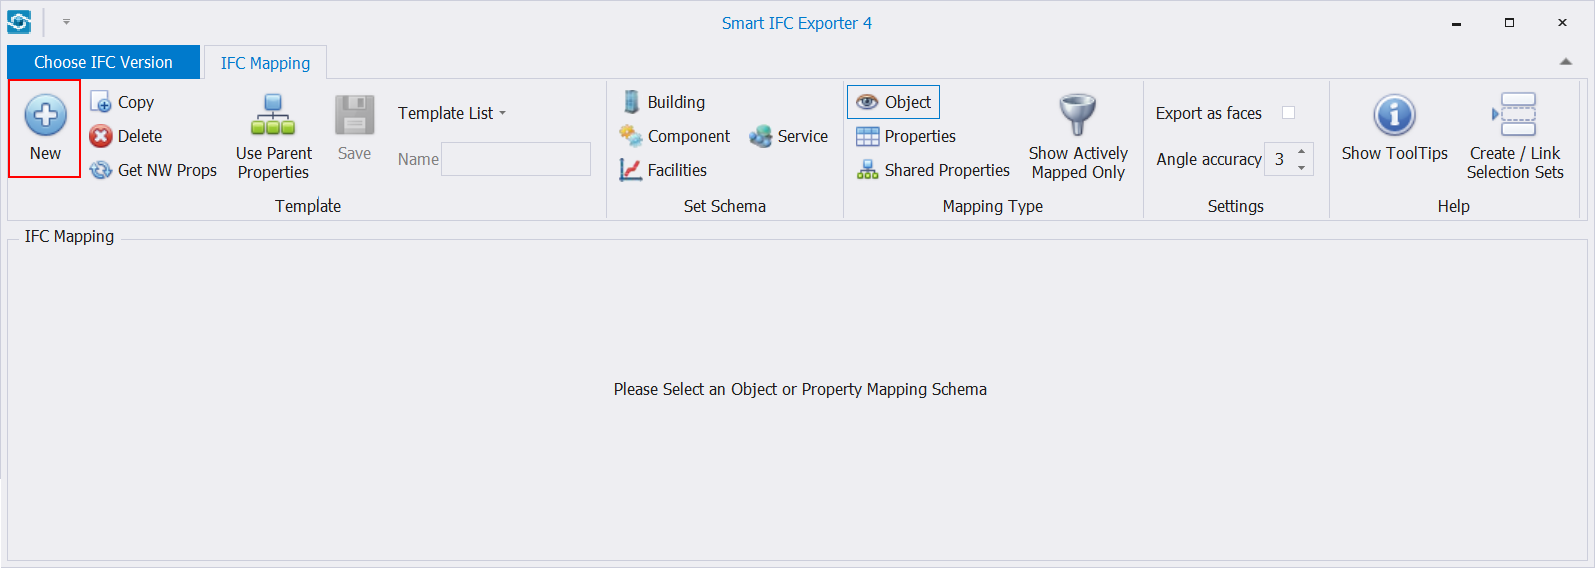
Click on New button.
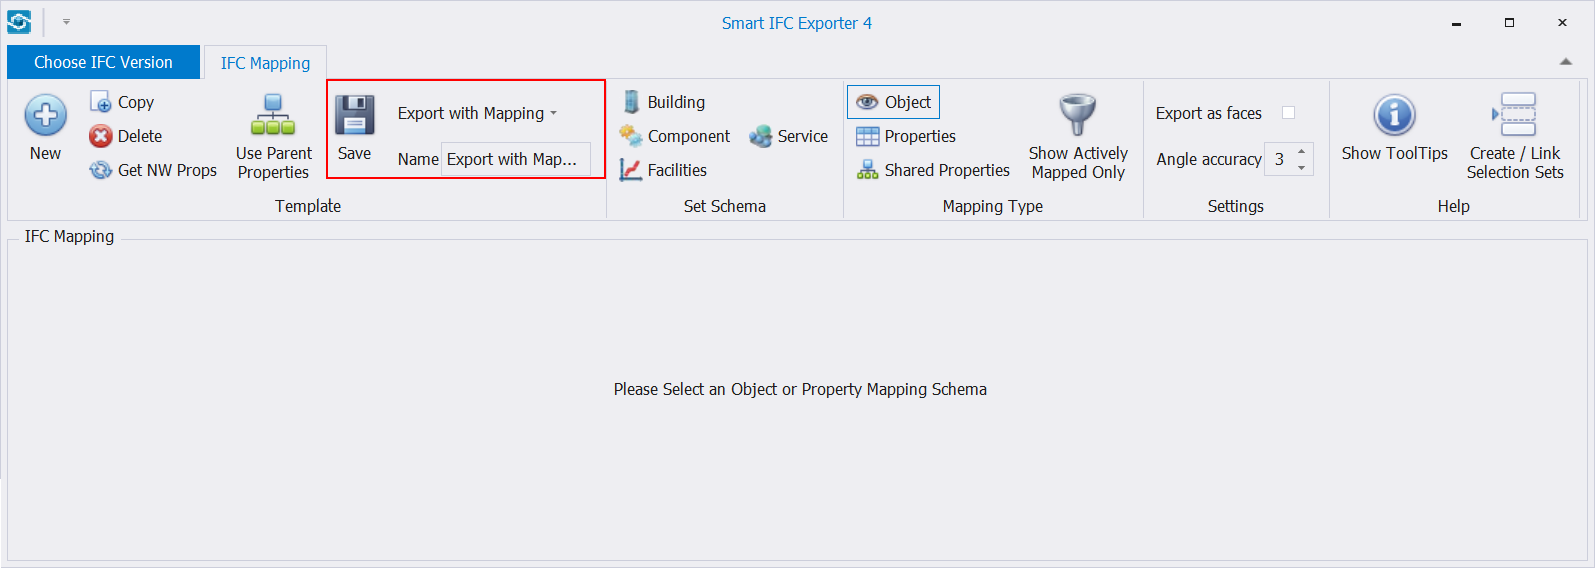
STEP 5:
Name the template and click Save.
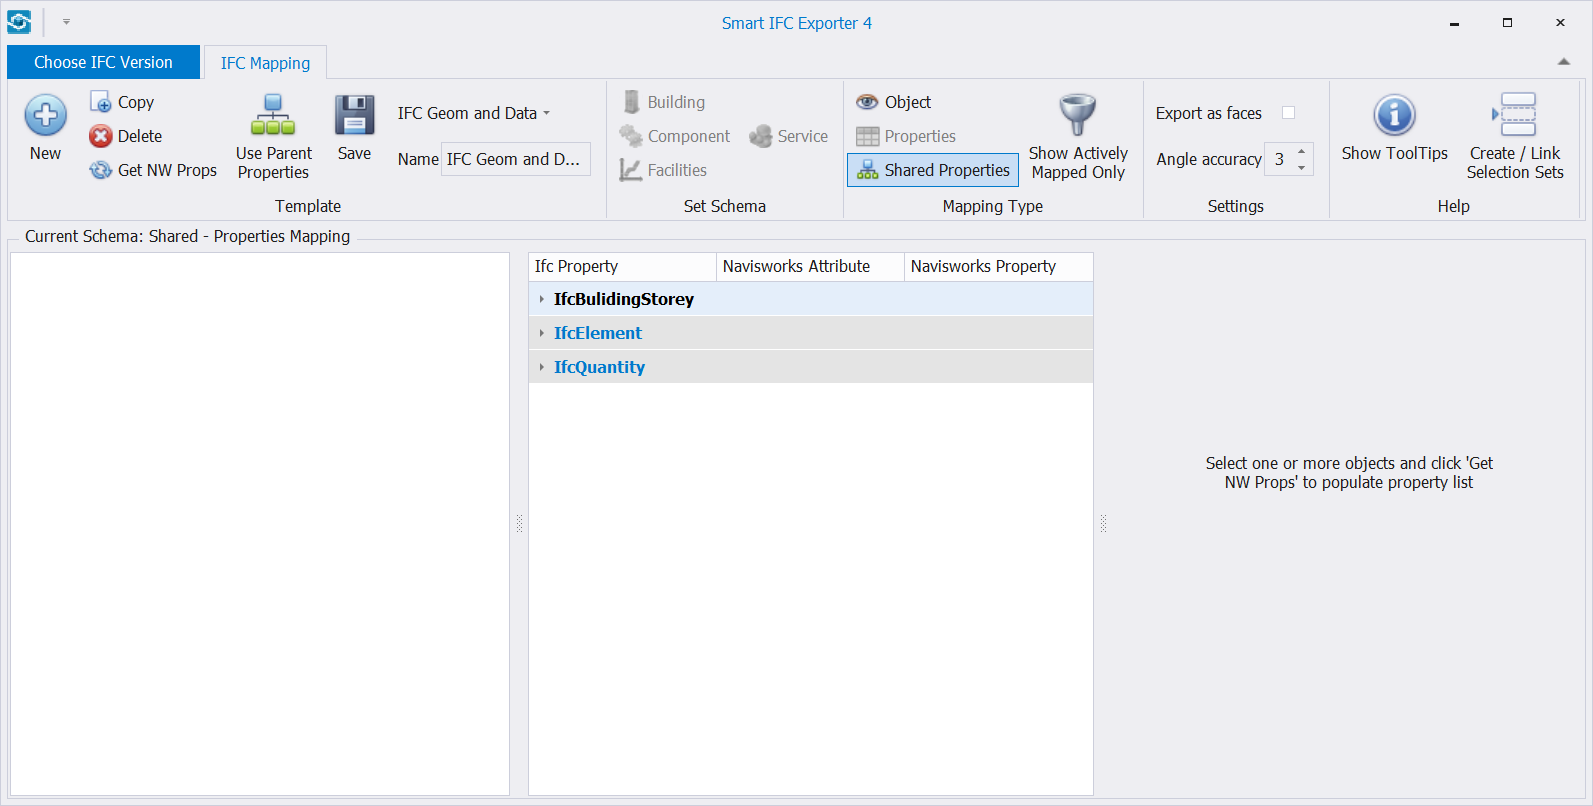
STEP 6:
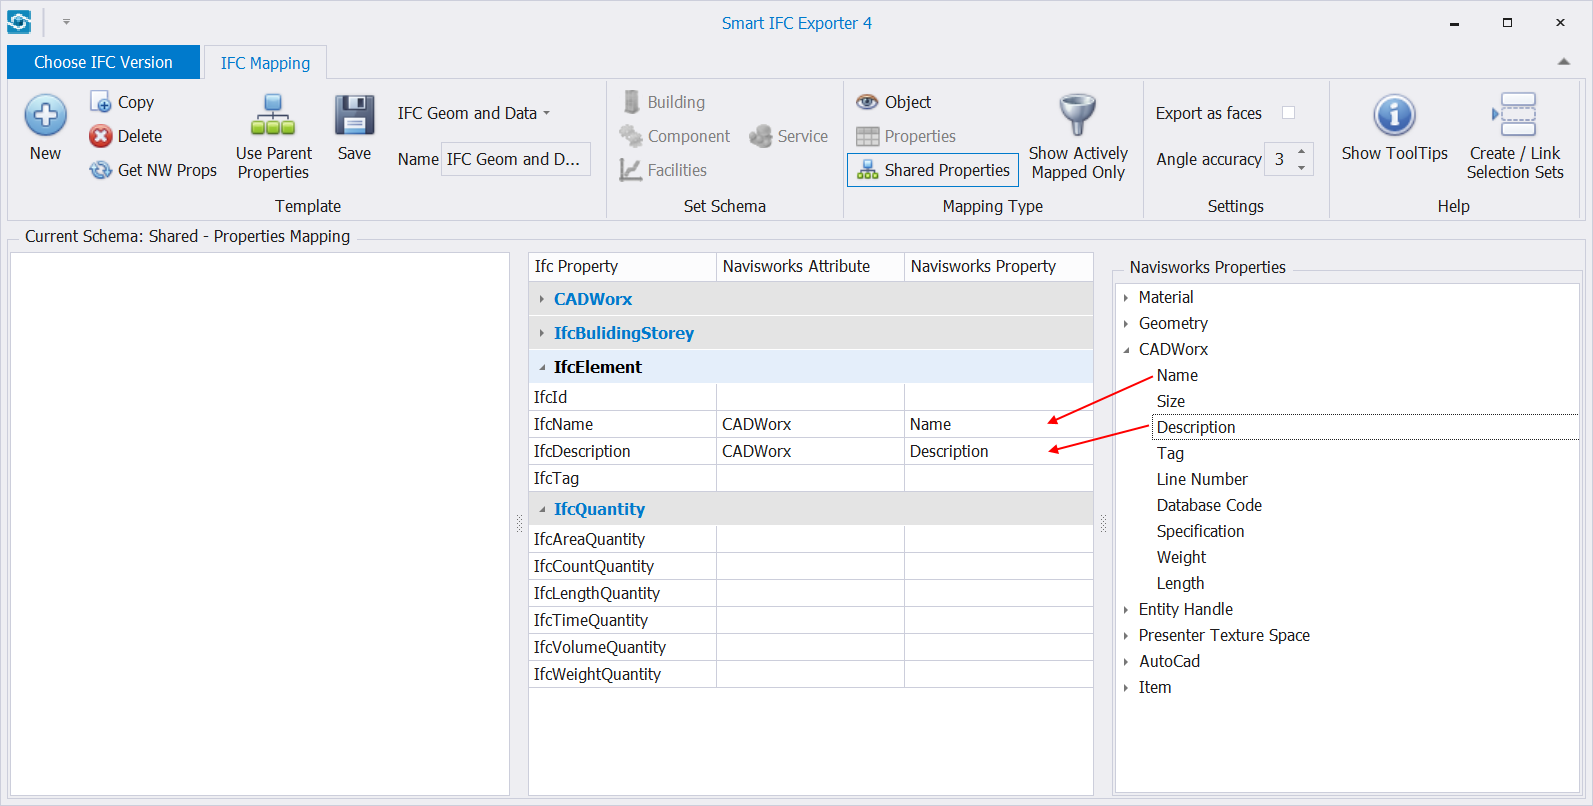
To add the data to IFC exported model, click Shared Properties icon.
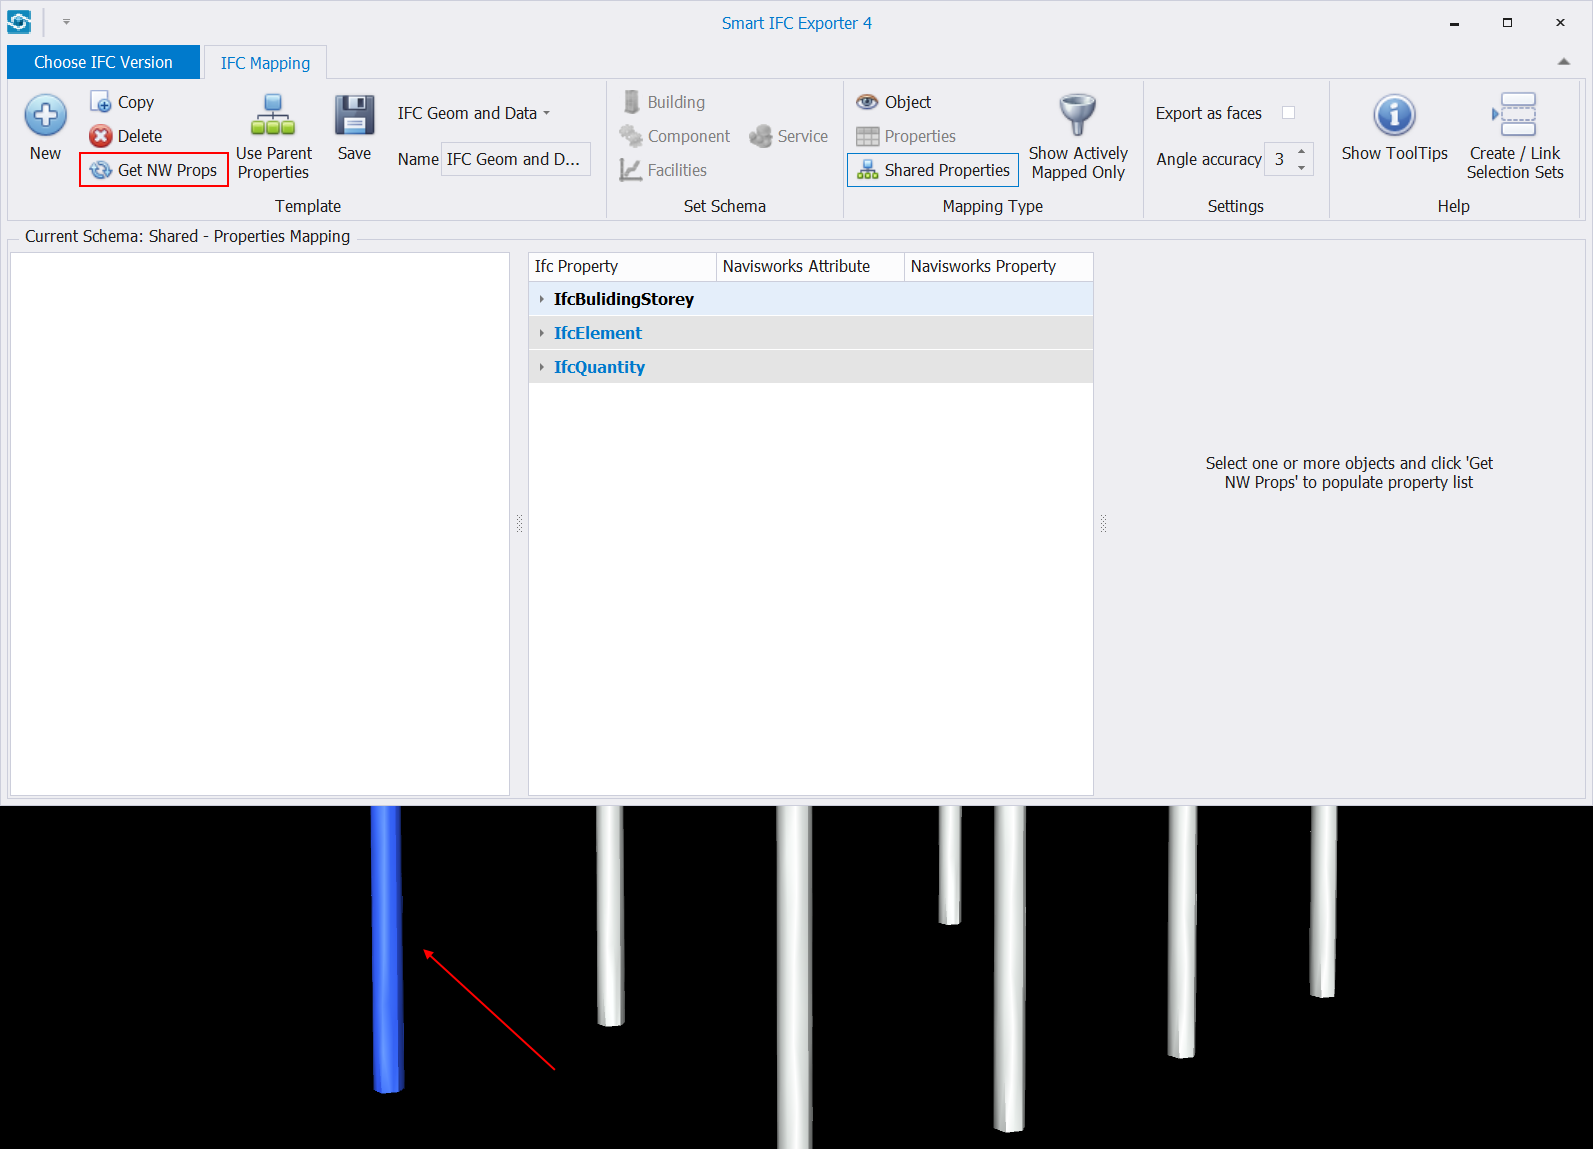
STEP 7:
Select an item in the background and click Get NW Props. This will populate the dialogue with the element properties.
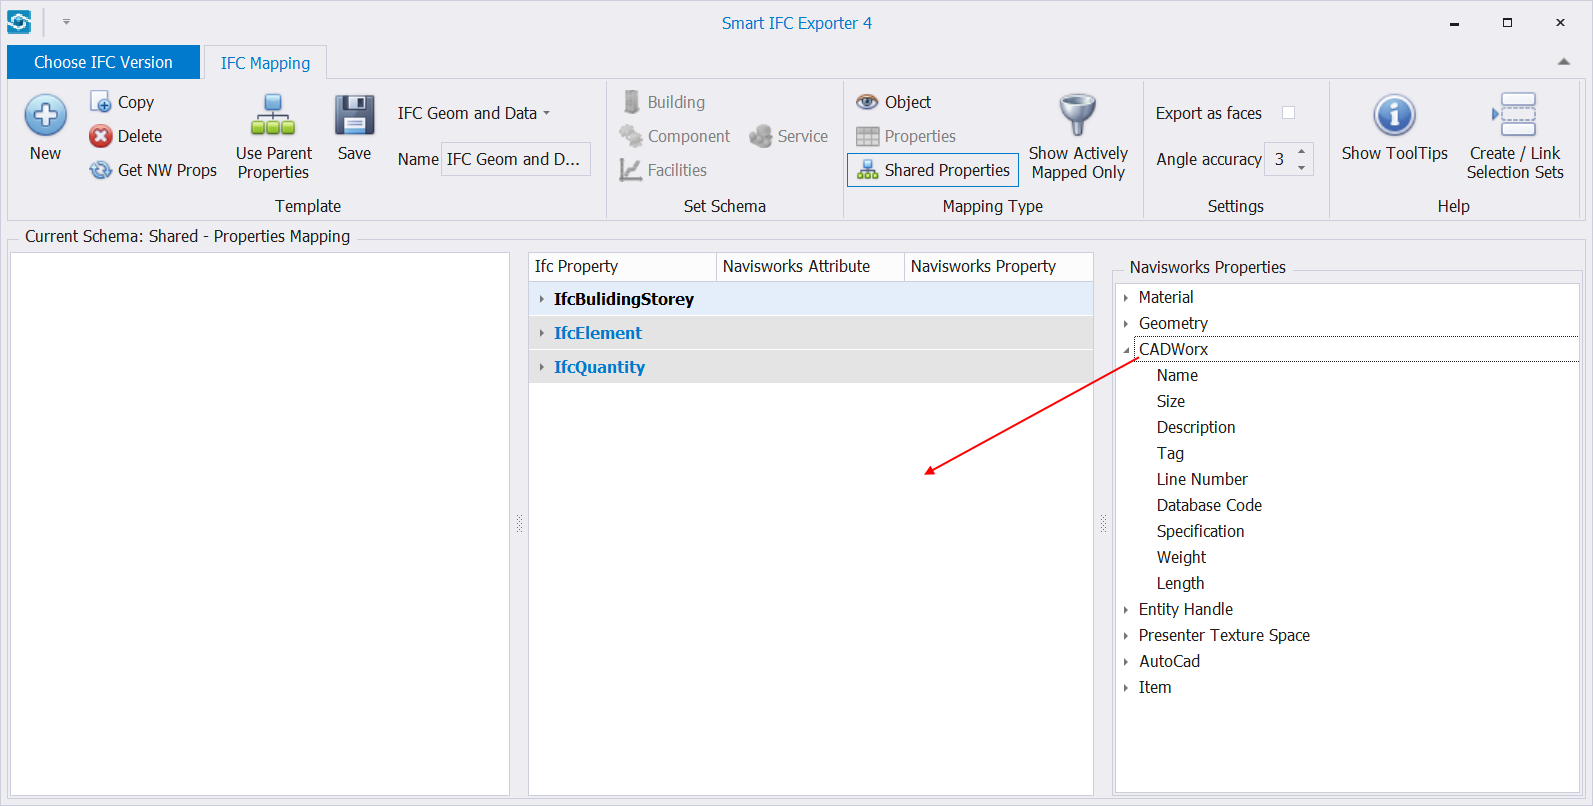
STEP 8:
Select the properties you want to add to exported model. Drag & drop it at the IFC Properties window.
STEP 9:
You can also associate model properties with IFC’s. Select a property and drag & drop it in the IFC property.
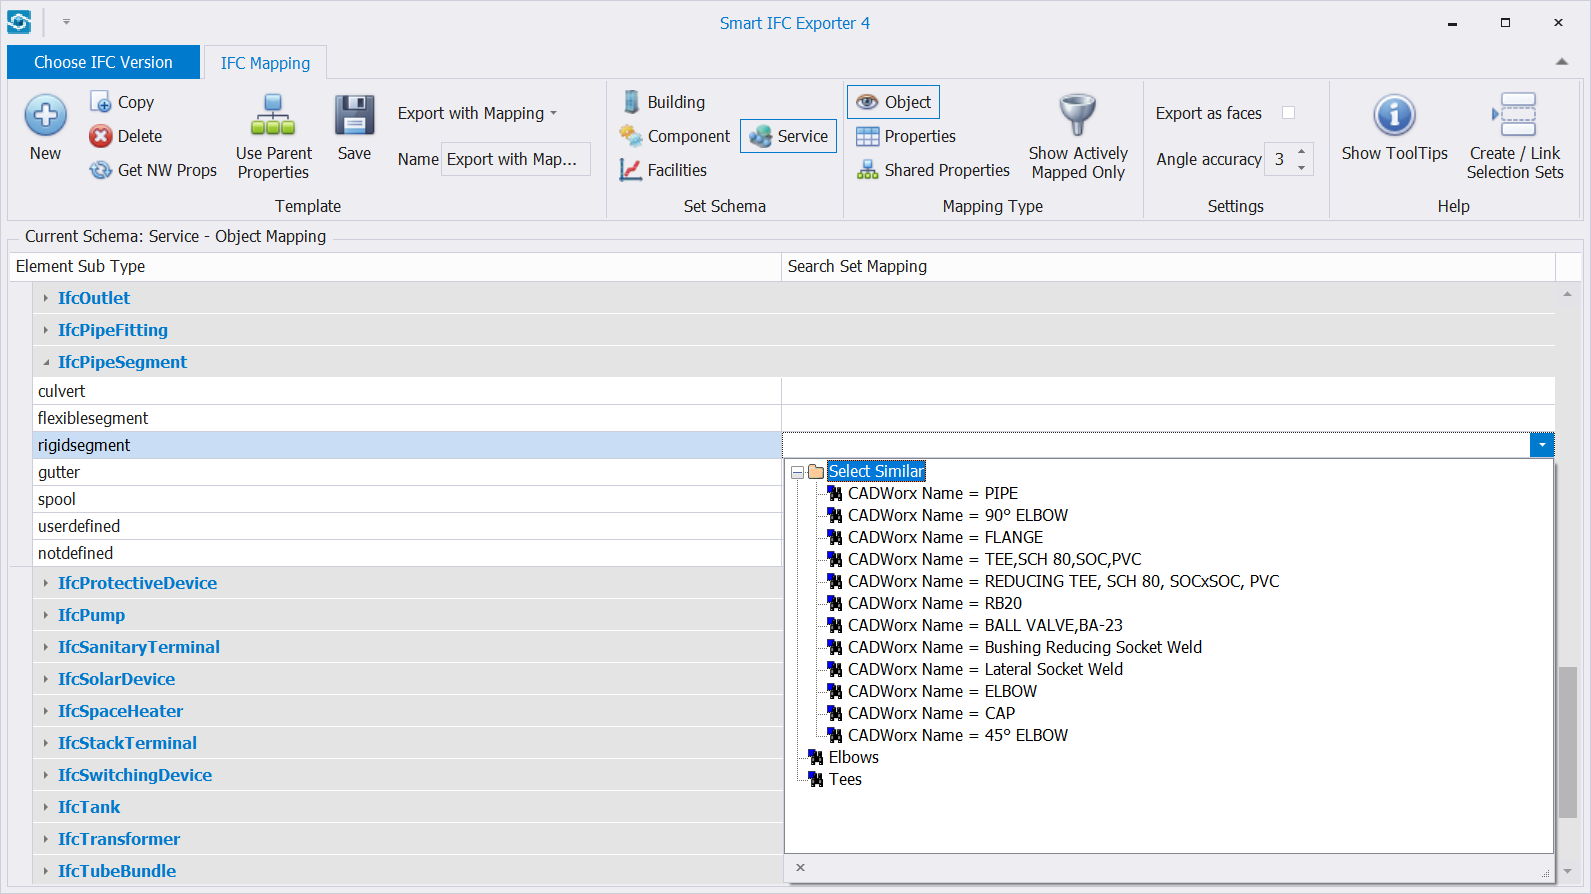
STEP 10:
Next step is to map the elements. Click Service icon and expand Element Sub Types.
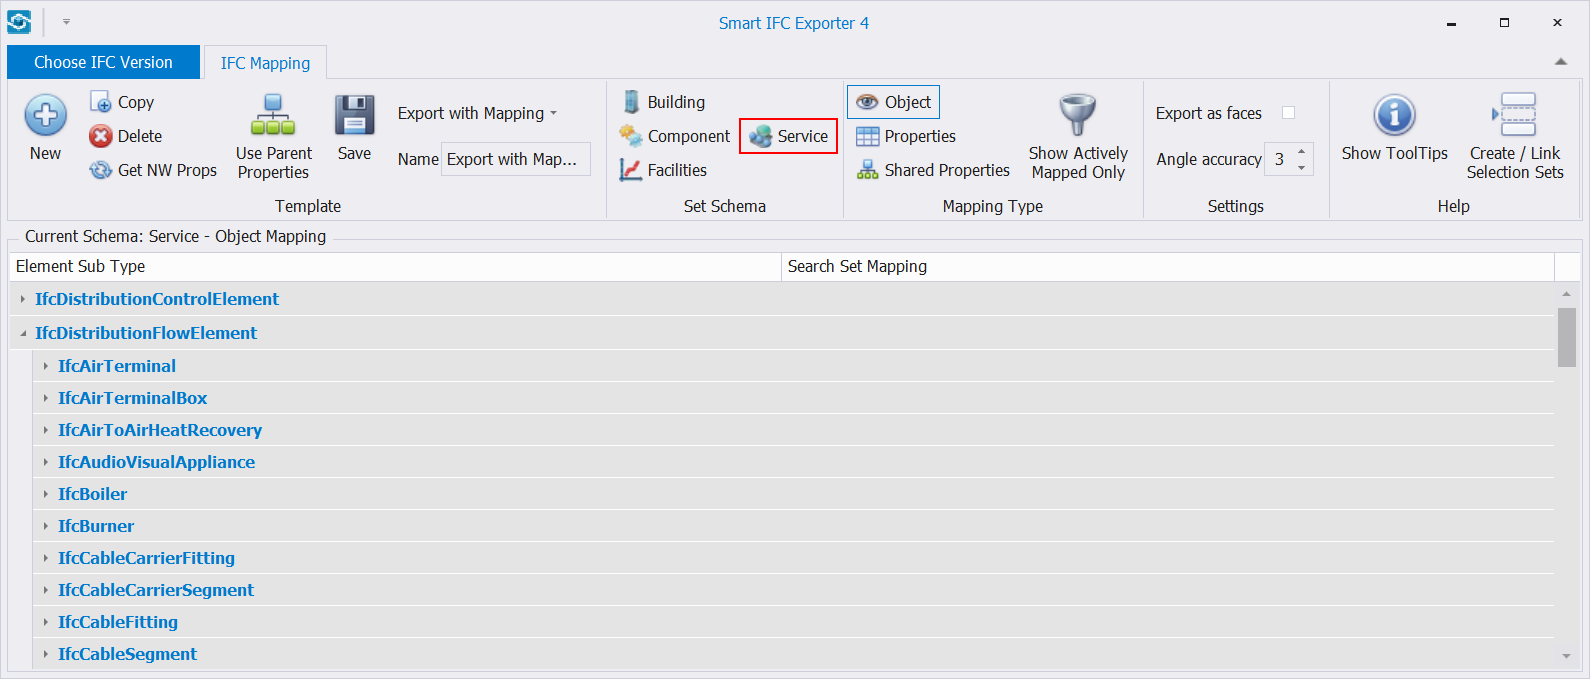
STEP 11:
Map the elements by selecting the Selection Set from the drop-down list. Map as many as you want.
STEP 12:
Click Save and close the dialog box.
Quick Overview:
Prepare Selection Sets ➤ Go to General Configuration tab ➤ Run Smart IFC Export Configuration ➤ Select IFC version ➤ Click New ➤ Name the template ➤ Click Save ➤ Open Shared Properties ➤ Select elements in the background ➤ click Get NW Props ➤ Drag & Drop element properties to IFC’s ➤ Click Service ➤ Choose the Selection Sets from drop-down list ➤ Click Save ➤ Close