Settings
The following steps will guide you through View Report settings.
STEP 1:
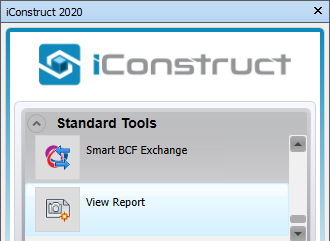
Go to Standard Tools in the iConstruct menu and click View Report button.
View Report templates can be created by clicking New. When a template other than the iConstruct Standard Template is selected the View Options tab will appear.
Ribbon Bar:
New: creates a new template.
Copy: copies an existing template.
Save: saves the current template.
Delete: deletes the current template.
Customize Report: launches the Report Designer.
Run: creates the report based on the current template and selected viewpoints.
Close: closes the View Report window.
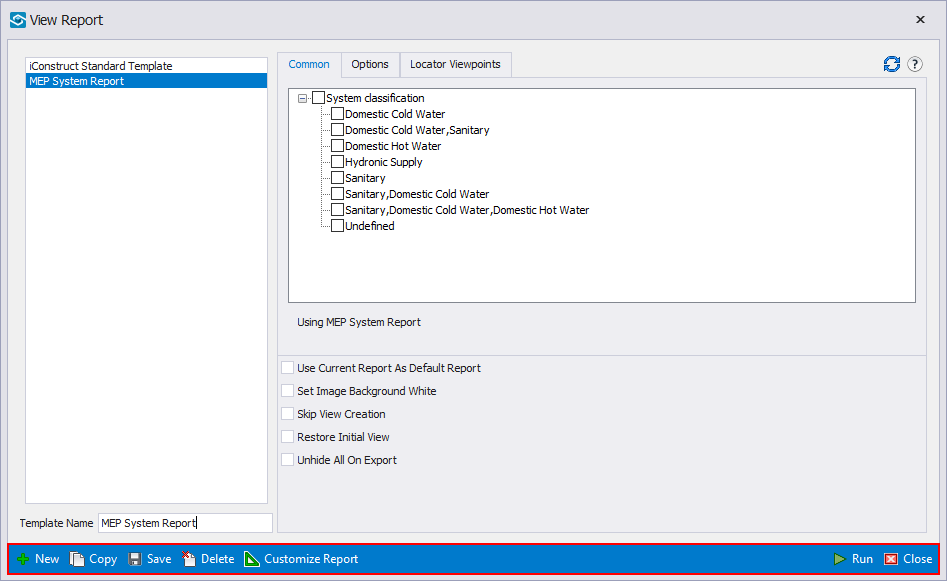
Common:
Use Current Report As Default Report: template will become the default Create View Report template instead of the iConstruct Standard Template.
Set Image Background White: changes the background to white before creating the views. Handy for generating reports to be printed.
Skip View Creation: Only the data for the views will be imported. This is useful for producing comment reports for example where there is a large number of views that would otherwise take a long time to process.
Restore Initial View: Saves the view when the report is first run, and restores it once the report is finished.
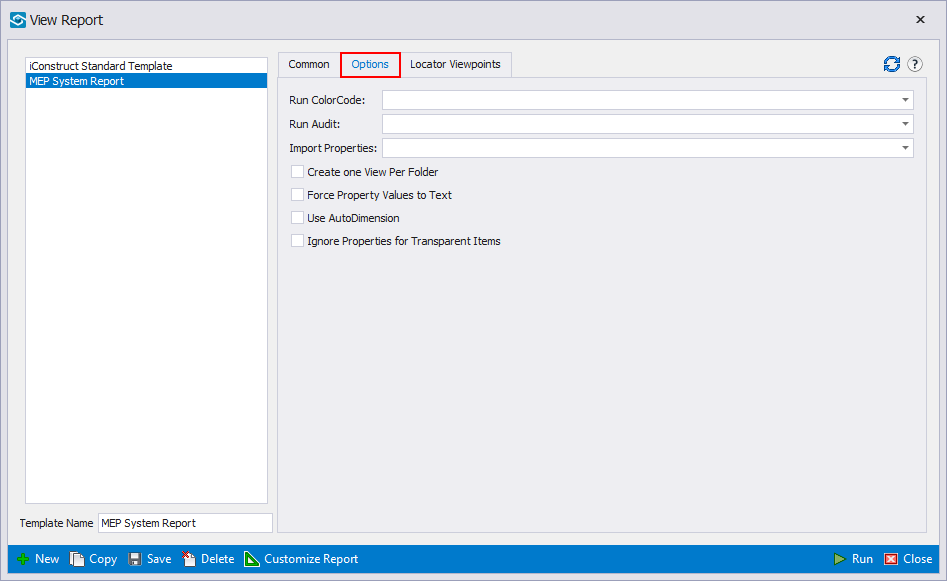
Options:
Run ColourCode: nominates a saved colourcode to run prior to generating the view report – this is especially handy for producing status reports. Enabling this option also adds a legend panel to each view.
Run Audit: similar to run colourcode although an audit is run to generate the colours. A legend panel is also generated for this option.
Import Properties: reads all associated properties from the visible objects of each view – note that the data is for all the objects across all views. For producing view-dependant tables use the Insert Table function.
Create one View Per Folder: - enabling this option will process each view in the last containing folder and store it as one page in the view report. See section 11.4 for more information on this option.
Force Property Values to Text: some models have inconsistent property data types, for example the field ‘Area:’ may start off in the model as the surface area and be stored as a decimal number then switch to a text description of the area in the overall model. Export View Report works on the assumption all property data types are consistent throughout the model. Enabling this option forces all fields to be imported as text, leaving it up to the user to format as required in the report designer. Alternatively, a better approach is to use Integrator but if the report is a one-off it will save time using this option.
Use AutoDimension: - if this option is enabled then Dimension Tool is run on each view. See article about Dimension Tool for further information regarding this feature.
Ignore Properties for Transparent Items: when reading properties for the view, ignore any items that are transparent.
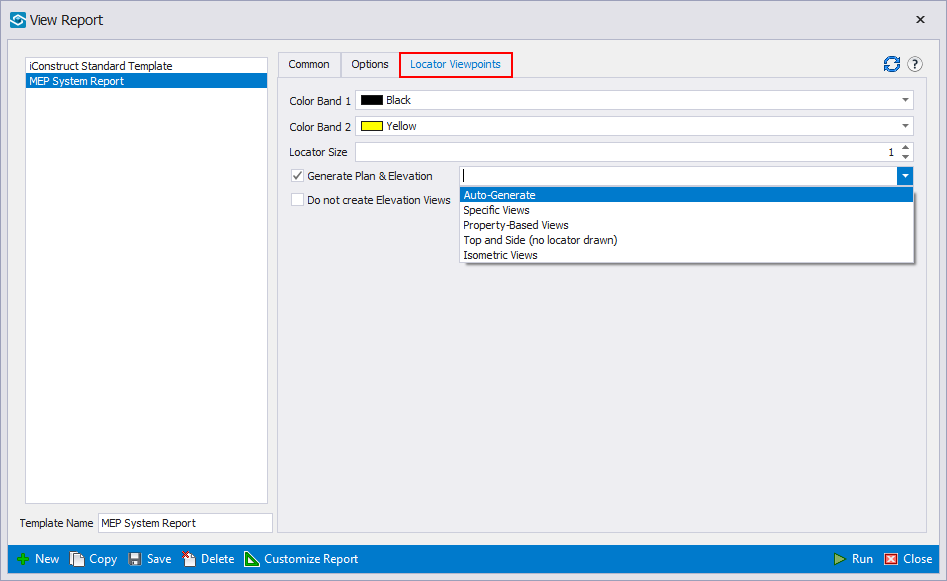
Locator Viewpoints:
The Locator Viewpoints tab contains configurable items for drawing locator circles on the view. If Generate Plan & Elevation is checked before running the reports, iConstruct will try to determine where the viewpoint camera is focused and draw a circle around the area in a plan and elevation viewpoint.
There are several modes for generating the locator viewpoint:
Auto-Generate: Unhide everything in the model and automatically generates a plan and elevation view of the entire model. On very large models this may take some time.
Specific Views: The user can nominate a standard plan & elevation view. For large models this is preferable as the user can hide bolts, plates etc. and leave only large concrete slabs and other relevant identifying geometry, speeding up the locator view generation process.
Property-based views: This is handy if, for example the viewpoints are part of a multistory building – you could assign a property ie Floor 1, Floor 2 etc. to the items and then when the viewpoint is created, the property is read from the visible items and the first matching viewpoint selected. This way a sectioned viewpoint can be made perlevel to improve visibility.
Top and Side (no locator drawn): this mode is similar to Auto-Generate with the exception that the view state is preserved, and no circle is drawn. This is useful when exporting a report consisting of views of single objects or modules.
Recommendations:
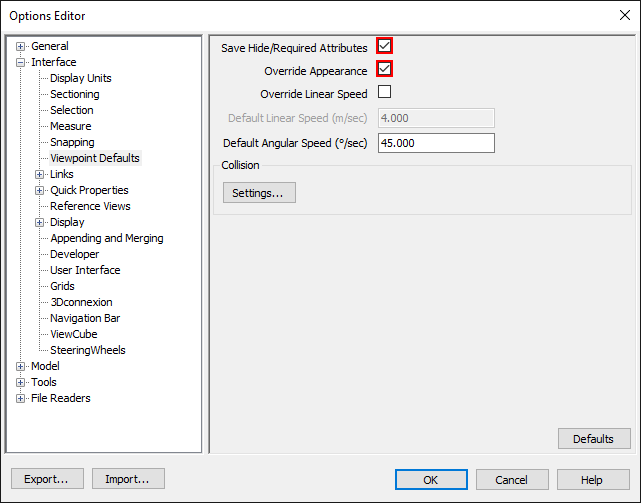
It is recommended users are familiar with Autodesk Navisworks viewpoint structure – for further information please consult the help system within Navisworks. It is recommended for best use of iConstruct that Save Hide/Required Attributes and Override Material are both set as default in Tools->Global Options from within Navisworks. This ensures that new viewpoints created from colour-coded views or displaying a selection subset preserve the view when saved.
Note: however that when using viewpoints for running a colour code as part of a report, you will need to untick Override Material for the views/folder to ensure the updated colours are used instead of the saved colours.
← Report Designer Usage →