Configuration
The following steps will show you how to set up the Center of Gravity Configuration.
STEP 1:
Go to General Configuration tab in the iConstruct menu and click Center of Gravity Configuration button.

STEP 2:
Choose the Marker Type from the drop-down list.

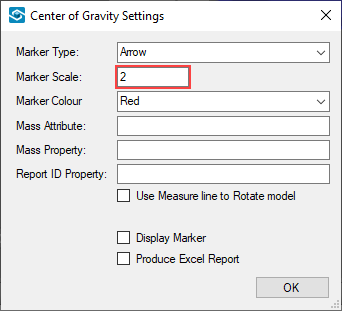
STEP 3:
Adjust the Marker Scale.
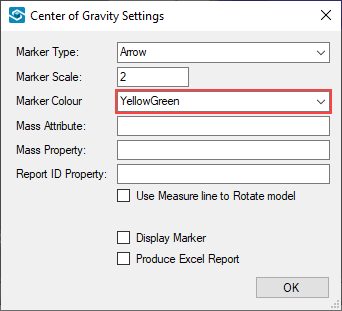
STEP 4:
Choose the Marker Colour from the drop-down list.
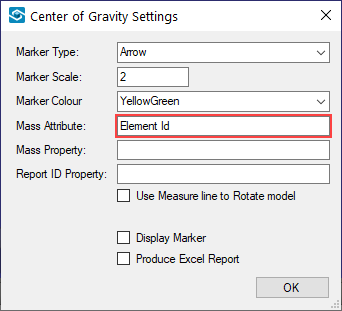
STEP 5:
Define the Mass Attribute.
Note: The Mass Attribute must be saved in the 0 level.
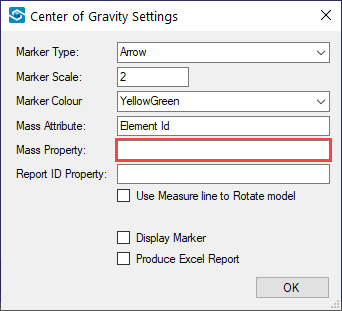
STEP 6:
Define the Mass Property if included (In our example we don't have the property saved in the model). If this property is defined the tool will use that value of the mass of the item when calculating the center of gravity.
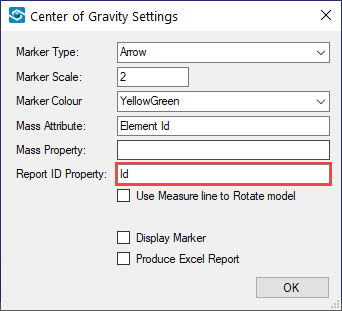
STEP 7:
Define the Report ID Property.
Note: The Report ID Property must be saved in the 0 level.
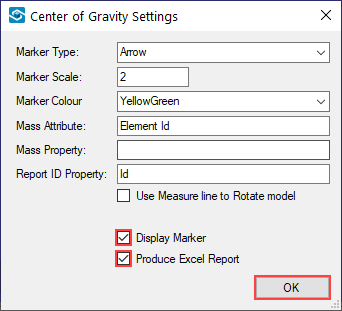
STEP 8:
Check Display Marker and Produce Excel Report and click OK button.
Quick Overview:
Go to General Configuration tab ➤ Click Center of Gravity Configuration ➤ Choose the Marker Type ➤ Adjust the Marker Scale ➤ Choose the Marker Colour ➤ Define the Mass Attribute ➤ Define the Report ID Property ➤ Check Display Marker and Produce Excel ➤ Click OK