Configuration
The following steps will show how to set up the Dynamic Labeler Configuration.
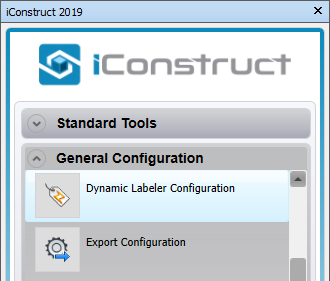
STEP 1:
Go to the General Configuration tab in iConstruct menu and run the Dynamic Labeler Configuration.
STEP 2:
Define the template name in the text box and press New Template button.
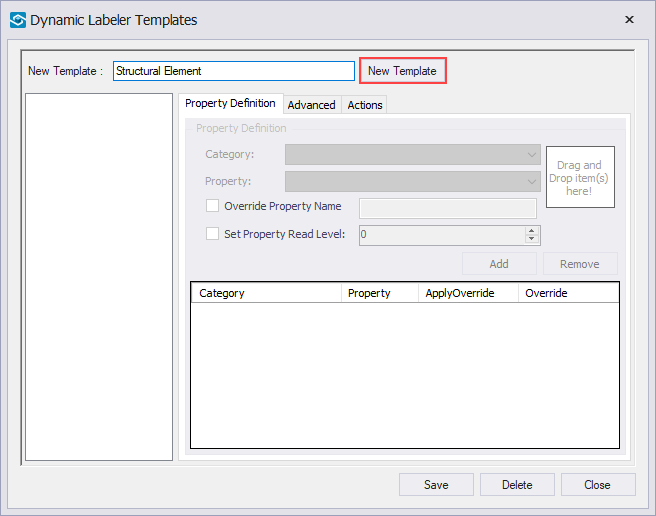
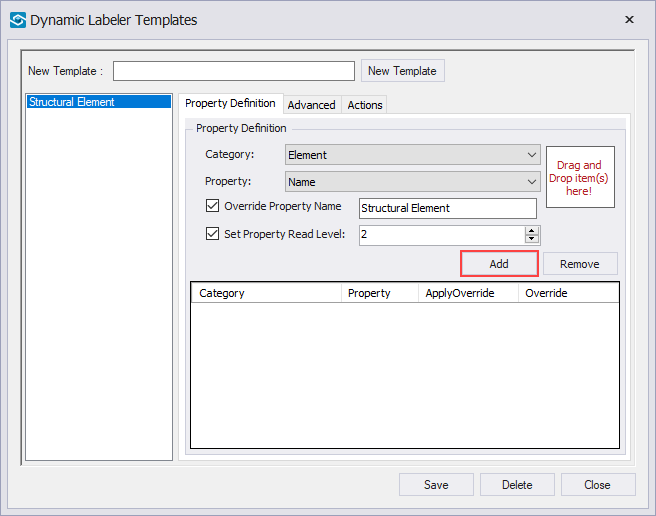
STEP 3:
Select an element in the background model and drag&drop it into the highlighted box.

STEP 4:
From the drop-down list select a Category and a Property that you would like to display on the label.
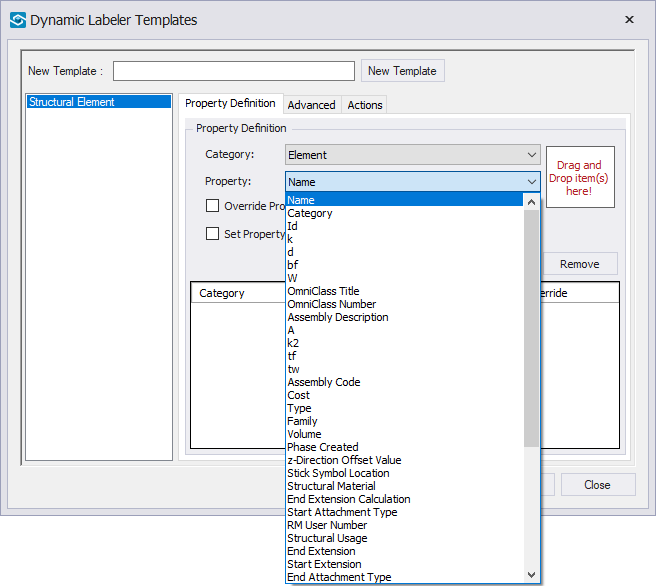
Optional: Change the Property display name on the label, by checking the Override Property Name and defining it in the text box.
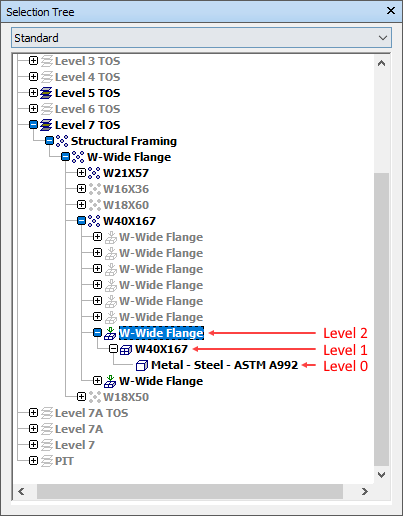
STEP 5:
Check Set Property Read Level to manualy specify the property read level. By default it is set to 0. In our example the property we are adding to the label resides in level 2.
STEP 6:
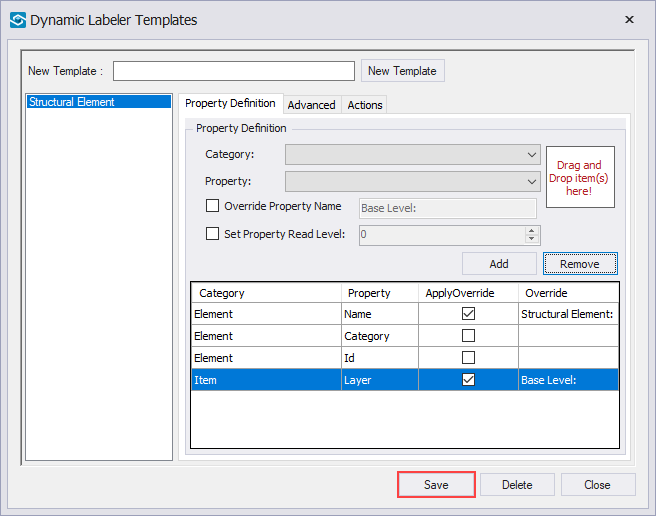
Press Add button to add the property. You can add as many properties as you wish. To remove a property from the list, simply select it and click on the Remove button.
STEP 7:
There are few additional settings and options in the Advanced and Action tab. You can change the font, alignment settings, create Saved Viewpoints automatically, etc.
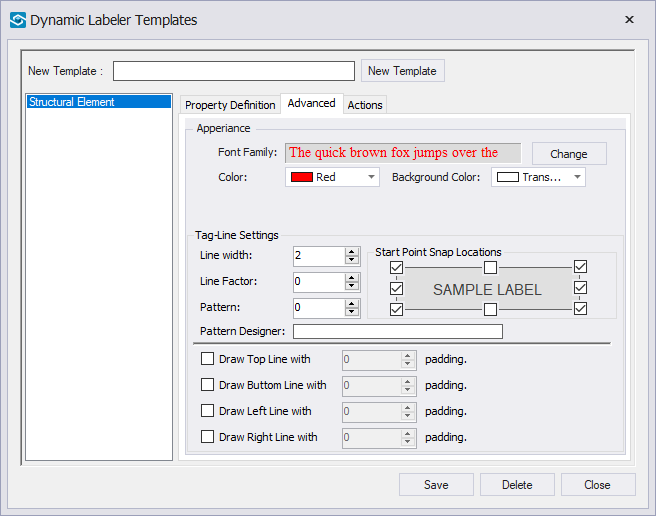
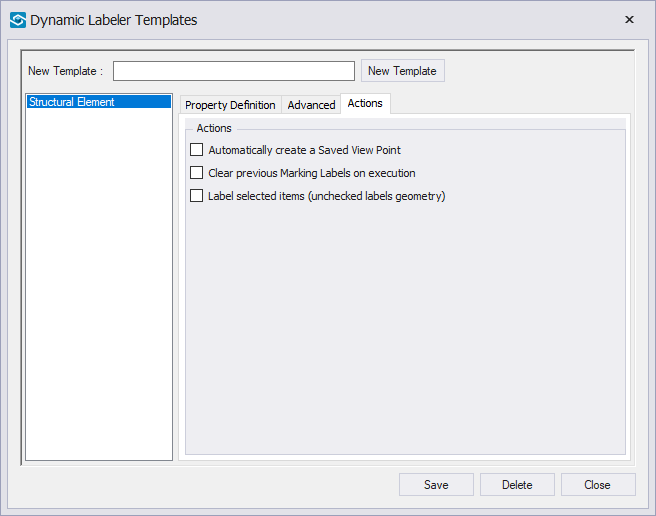
Advanced and Actions tab.
STEP 8:
Save the tempalte and close the dialogue box.
Quick Overview:
Go to General Configuration ➤ Run Dynamic Labeler Configuration ➤ Define a new template name ➤ Drag and Drop an item ➤ Select the Category and Property ➤ Set Property Read Level ➤ Add the property ➤ Save and Close