Configuration
The following steps will show how to configure the Dimension Tool.
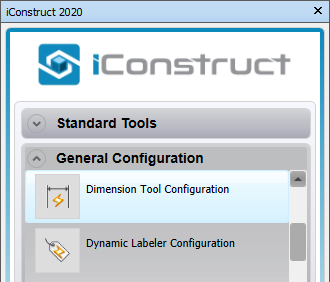
STEP 1:
Go to the General Configuration tab in iConstruct menu and run the Dimension Tool Configuration.
STEP 2:
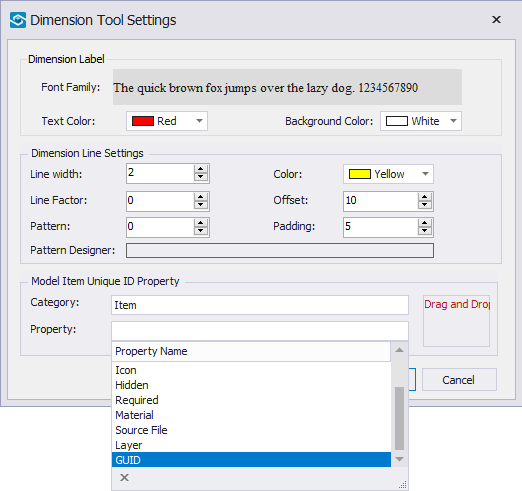
This is an overview of the configurable items:
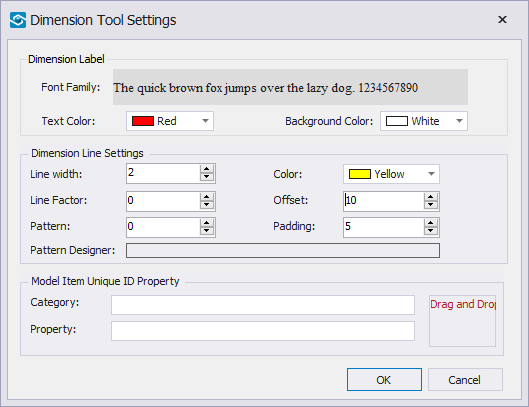
Dimension Label:
Set the font, font color and background color (area behind the dimension text).
Dimension Line Settings:
Line Width: the width in pixels of the dimension line.
Line Factor: adjust the scale of the pattern.
Pattern: numerical representation of the pattern designer.
Pattern Designer: click in here to design a dimension line pattern.
Color: colour of the dimension line.
Offset: distance of the line from the dimension points selected. This is entered in mm and converted to file units.
Padding: distance before the dimension line brackets start. This is entered in mm and converted to file units.
Model Item Unique Property: required for associating the dimension with the object, must be unique in the model.
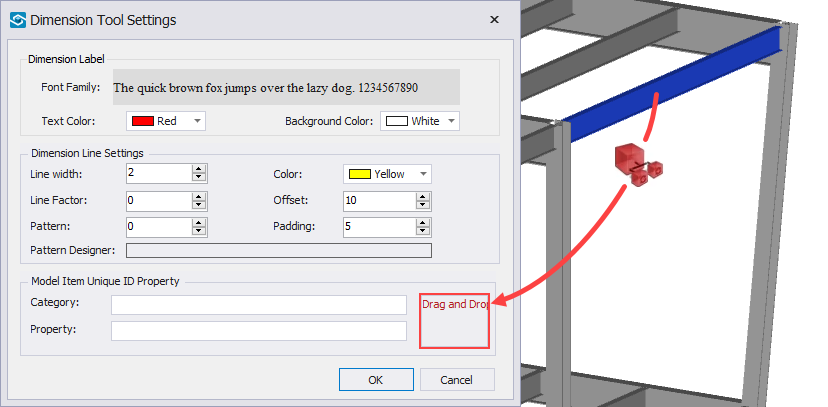
STEP 3:
Select an element in the background model and drag&drop it into the highlighted box.
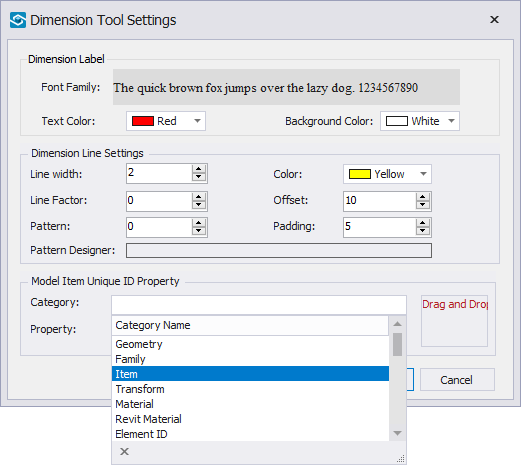
STEP 4:
Click into blank area next to the Category. In the drop-down list choose your Category (Item in our example).
STEP 5:
Define the Property. In the drop-down list choose your unique Property (GUID in our example). It’s important that the Property is unique for each object.
STEP 6:
Click OK.
Quick Overview:
Go to General Configuration ➤ Run Dimension Tool Configuration ➤ Set dimension settings ➤ Drag&Drop element in the window ➤ Define unique Category and Property ➤ Click OK